Blog

Your blog category

what is the best solar company

Best Solar Companies of 2023: How to Choose the Right One for Your Home

Solar energy is one of the most abundant and clean sources of renewable energy in the world. 

However, choosing the right solar company for your home can be a daunting task, 

as there are many factors to consider, such as the quality, efficiency, cost, warranty, and reputation of the solar products and services.

In this blog, we will help you find the best solar company for your home by providing some tips and recommendations based on the latest web search results.

Tips for Choosing the Best Solar Company for Your Home
Before you decide on a solar company for your home,

 you should do some research and comparison to find the best option for your needs and budget. 

Here are some tips to help you choose the best solar company for your home:

• Check the credentials and certifications of the solar company. 

You should look for a solar company that is licensed, insured, and bonded in your state, and has the necessary certifications from reputable organizations, 

such as the North American Board of Certified Energy Practitioners (NABCEP),

 the Solar Energy Industries Association (SEIA), 

or the Better Business Bureau (BBB).

• Compare the products and services of the solar company. 

You should look for a solar company that offers high-quality and high-efficiency solar products, 

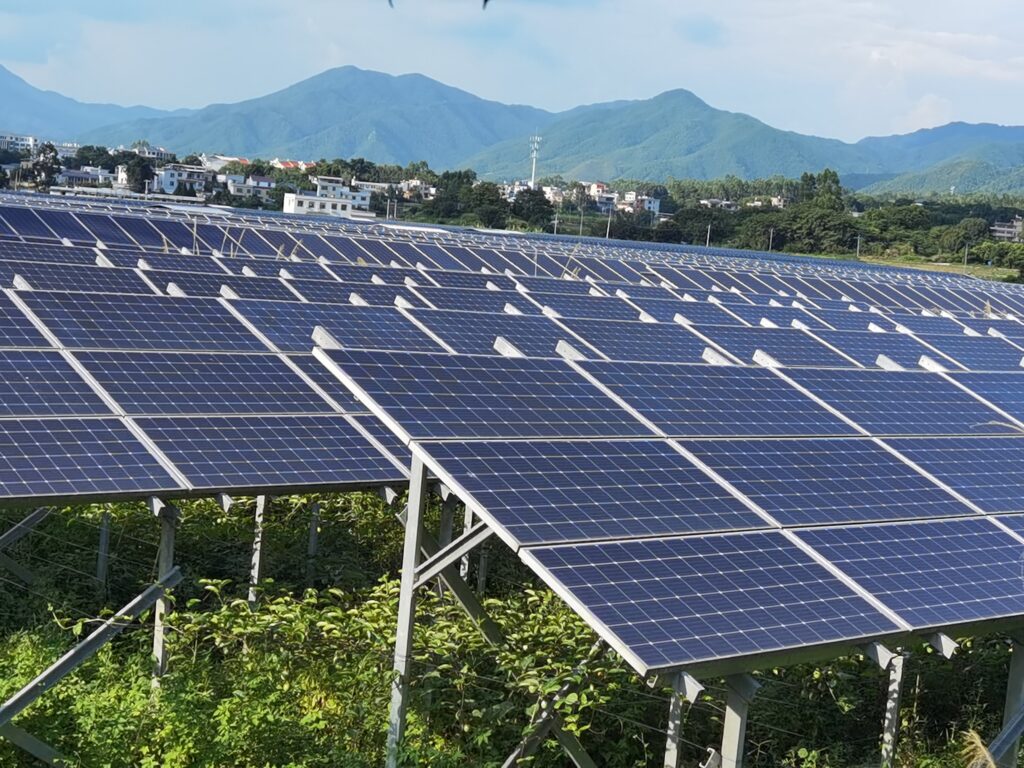
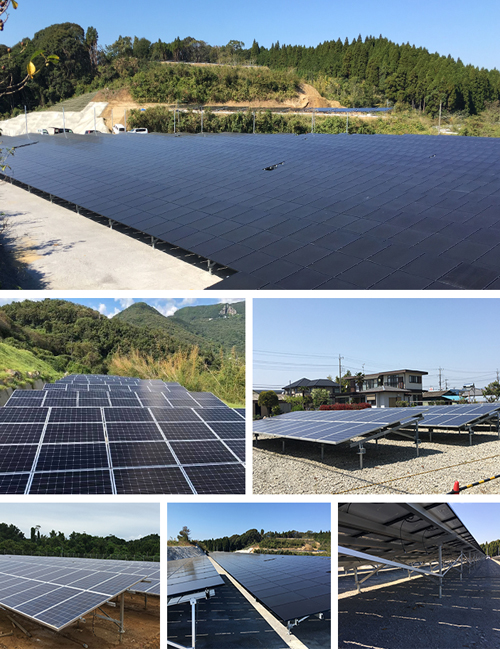
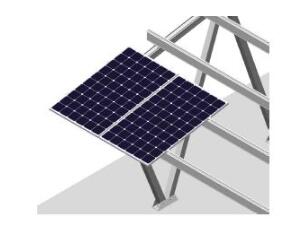
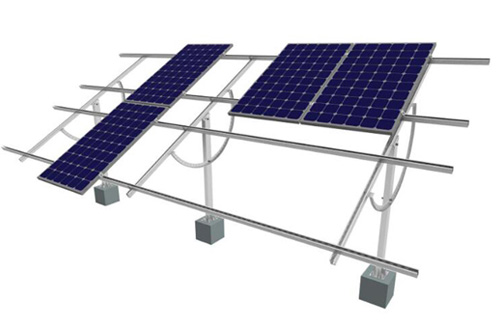
such as solar panels, inverters, batteries, solar mounting system and chargers,

 that are compatible with your home’s electrical system and roof type. You should also look for a solar company that offers

 comprehensive and flexible services, 

such as free consultation, design, installation, maintenance, and support, 

as well as various financing options, such as cash, loan, lease, or power purchase agreement (PPA).

• Read the reviews and ratings of the solar company. 

You should look for a solar company that has positive and consistent reviews and ratings from previous and current customers, 

as well as from independent sources, such as online platforms, magazines, or websites. 

You should also look for a solar company that has a good reputation and ranking among the national or local solar industry, 

such as the U.S. News 360 Reviews  https://www.usnews.com/360-reviews/services/best-solar-companies,

 the Solar Power World Top Solar Contractors, or the EnergySage Solar Marketplace.

Recommendations for the Best Solar Companies of 2023


Based on the web search results, here are some of the best solar companies of 2023 that you may want to consider for your home:

1.SunPower: SunPower is a leading solar company that has been operating for more than 30 years. 

SunPower offers high-efficiency and high-quality solar products, such as the Maxeon solar panels that have a 22.8% efficiency rating

 and a 25-year warranty. 

SunPower also offers various financing options, such as cash, loan, lease, or PPA, and a 25-year service, product, and production

 guarantee for every installation https://www.cnet.com/home/energy-and-utilities/tesla-vs-sunpower/

2• ADT Solar: ADT Solar is a subsidiary of ADT, the well-known home security company. 

ADT Solar offers low-cost and flexible solar products and services, such as free equipment repair and replacement, multiple

 financing options, and a price match guarantee. ADT Solar also offers solar batteries and backup features, as well as home security

 and automation solutions https://www.usnews.com/360-reviews/services/best-solar-companies

3• Sunrun: Sunrun is the largest residential solar company in the U.S., with over 500,000 customers. 

Sunrun offers affordable and reliable solar products and services, such as the Brightbox solar battery and backup system, 

the Brightsave monthly or prepaid plans, and the Brightbuy or Brightadvantage cash or loan options. 

Sunrun also offers a 25-year warranty, a 10-year roof penetration warranty, and a performance guarantee for every

 installation  https://www.solarfeeds.com/mag/top-solar-manufacturers-in-china/

These are just some of the best solar companies of 2023 that you may want to consider for your home. 

However, you should always do your own research and comparison before making a final decision, 

As the best solar company for your home may depend on your specific needs and preferences.

I hope this blog was helpful for you. If you have any questions or feedback, please let me know.

how to install a ground mount solar system

Ground Mount Solar System: A Guide to Installing Solar Panels on the Ground
Solar panels are a great way to generate clean and renewable energy for your home or business. 

However, not everyone has a suitable roof for installing solar panels. 

If you have a large land area, low shading, or prefer not to drill holes in your roof, 

you may want to consider installing solar panels on the ground.

Ground mounting

Ground mount solar system is a term that refers to installing solar panels on the ground, using either a fixed or a tracking mounting system. 

A fixed mounting system holds the solar panels at a fixed angle and orientation, usually facing south in the northern hemisphere and north in the southern hemisphere. 

A tracking mounting system adjusts the angle and orientation of the solar panels according to the movement of the sun, increasing the energy output by up to 25%.

In this blog, we will show you how to install solar panels on the ground using ground mount solar system in four easy steps.

Step 1: Choose the Right Location and Size for Your Ground Mount Solar System
The first step to install solar panels on the ground using ground mount solar system is to choose the right location and size for your ground mount solar system. You need to consider the following factors:

• The size and shape of your land and the amount of sunlight it receives

• The type and size of your solar panels and the amount of electricity they can produce

• The cost and efficiency of your solar panels and the payback period of your investment

• The local zoning and building codes and regulations that may affect the size, height, and placement of your ground mount solar system

You can use online tools, such as ValkPVplanner https://www.solarfeeds.com/mag/ground-mount-solar-system-manufacturers-china/ by Van der Valk Solar Systems https://www.solarfeeds.com/mag/ground-mount-solar-system-manufacturers-china/, to help you calculate the correct dimensions and materials for your ground mount solar system.

Step 2: Prepare the Site and Foundation for Your Ground Mount Solar System


The second step to install solar panels on the ground using ground mount solar system is to prepare the site and foundation for your ground mount solar system. 

You need to do the following tasks:

• Clear the site of any debris, vegetation, or obstacles that may interfere with the installation

• Level the site and compact the soil to ensure a stable and even surface

• Mark the location and layout of the base rails and posts using stakes and strings

• Dig holes for the posts according to the manufacturer’s instructions, usually at least 1 meter deep

• Pour concrete into the holes and insert the posts, making sure they are plumb and aligned

• Attach the base rails to the posts using bolts or screws

Alternatively, you can hire a professional contractor to lay a concrete slab or use ground screws instead of concrete foundations for your ground mount solar system.

Step 3: Assemble the Frames and Panels for Your Ground Mount Solar System.

The third step to install solar panels on the ground using ground mount solar system is to assemble the frames and panels for your ground mount solar system. 

You need to follow these steps:

• Unpack the components of your ground mount solar system kit and check if they are complete and undamaged

• Lay out the frames on the ground according to the manufacturer’s instructions

• Connect the frames using bolts or screws, making sure they are square and secure

• Lift the frames onto the base rails and attach them using bolts or screws

• Lay out the panels on top of the frames according to the manufacturer’s instructions

• Attach the panels to the frames using clamps or bolts, making sure they are aligned and overlapping

Step 4: Connect Your Ground Mount Solar System to Your Home’s Electrical System

The fourth step to install solar panels on the ground using ground mount solar system is to connect your ground mount solar system to your home’s electrical system. 

You need to do these tasks:

• Run conduit from your ground mount solar system to your home’s main service panel

• Install an AC disconnect switch near your home’s main service panel

• Connect the conduit wires to your home’s main service panel through a dedicated circuit breaker

• Install an electric meter near your home’s main service panel

• Connect your ground mount solar system to your utility grid through a net metering program

Alternatively, you can hire a licensed electrician to perform these tasks for you.

Conclusion
Installing solar panels on the ground using ground mount solar system is not a difficult task, but it does require some planning and preparation. 

By following these four easy steps, you can install solar panels on the ground using ground mount solar system in no time:

• Choose the right location and size for your ground mount solar system

• Prepare the site and foundation for your ground mount solar system

• Assemble the frames and panels for your ground mount solar system

• Connect your ground mount solar system to your home’s electrical system

A ground mount solar system is a great way to generate clean and renewable energy for your home or business. A ground mount solar system can also save you space, money, environment, enhance aesthetics, and provide convenience. To choose the best ground mount solar system for your needs, you can use some online tools or consult with a professional solar installer.

how many planets are there

 What Are They and How Do They Form?


A solar system is a collection of objects that orbit a central star. The objects can include planets, moons, asteroids, comets, and other smaller bodies. 

A solar system can also have rings, which are bands of dust and ice that encircle some planets, and belts, which are regions of space where many small bodies are clustered.

The most well-known solar system is our own, which consists of the Sun and eight planets: Mercury, Venus, Earth, Mars, Jupiter, Saturn, Uranus, and Neptune. Our solar system also has five recognized dwarf planets: Ceres, Pluto, Haumea, Makemake, and Eris. In addition, our solar system has hundreds of moons, millions of asteroids, billions of comets, and countless other small bodies.

sun solar system

Our solar system is located in the Orion Arm of the Milky Way galaxy, about 27,000 light-years from the galactic center. Our solar system orbits the galactic center once every 225 to 250 million years. 

Our solar system is also part of a larger group of stars called the Local Group, which is part of an even larger group of galaxies called the Virgo Supercluster.

How did our solar system form?

According to the most widely accepted theory, our solar system formed about 4.6 billion years ago from the gravitational collapse of a giant interstellar molecular cloud. 

The cloud was mostly made of hydrogen and helium gas, but also contained traces of heavier elements from previous generations of stars.

As the cloud collapsed, it spun faster and flattened into a rotating disk called the protoplanetary disk. 

The center of the disk became so hot and dense that it ignited nuclear fusion and became the Sun. 

The rest of the disk cooled and condensed into smaller clumps that collided and stuck together to form larger bodies called planetesimals.

 Some of these planetesimals grew big enough to attract more gas and dust from the disk and 

became the planets and their moons. The remaining planetesimals became the asteroids and comets.

The formation of our solar system was not a smooth and peaceful process. It involved many violent events such as collisions, impacts, explosions, and migrations.

 For example:

• The early Earth was hit by a Mars-sized object that ejected a large amount of material into orbit. This material coalesced to form the Moon.

• Jupiter’s gravity stirred up the asteroid belt and prevented it from forming a planet. Jupiter also migrated inward and outward in its orbit, affecting the orbits of other planets.

• Neptune’s gravity scattered many Kuiper belt objects into the outer solar system or into the inner solar system. Some of these objects became comets that bombarded the inner planets.

• A nearby supernova explosion may have triggered the formation of our solar system by compressing the molecular cloud with its shockwave.

Our solar system is not unique in the universe. There are billions of other stars in our galaxy that have their own solar systems. Thanks to advances in astronomy and technology, we have discovered thousands of exoplanets (planets outside our solar system) orbiting other stars. 

Some of these exoplanets are similar to Earth in size and distance from their stars, raising the possibility of life beyond our solar system.

Our solar system is a fascinating and complex place that we are still exploring and learning about. 

By studying our solar system, we can gain insights into how other solar systems form and evolve, and how life may arise and survive in different environments.

ground solar mounting

A Guide to Installing Solar Panels on the Ground

Not everyone has a suitable roof for installing solar panels. If you have a large land area, low shading, or prefer not to drill holes in your roof, you may want to consider installing solar panels on the ground. Ground solar mounting is a term that refers to installing solar panels on the ground, using either a fixed or a tracking mounting system.

 In this blog, we will show you how to install solar panels on the ground using ground solar mounting in four easy steps. 

Step 1:

Choose the Right Location and Size for Your Ground Solar Mounting System
The first step to install solar panels on the ground using ground solar mounting is to choose the right location and size for your ground solar mounting system. You need to consider the following factors:

• The size and shape of your land and the amount of sunlight it receives

• The type and size of your solar panels and the amount of electricity they can produce

• The cost and efficiency of your solar panels and the payback period of your investment

• The local zoning and building codes and regulations that may affect the size, height, and placement of your ground solar mounting system

You can use online tools, such as ValkPVplanner https://www.solarportsystems.com/ by Van der Valk Solar Systems https://www.solarportsystems.com/, to help you calculate the correct dimensions and materials for your ground solar mounting system. 

Step 2:

Prepare the Site and Foundation for Your Ground Solar Mounting System
The second step to install solar panels on the ground using ground solar mounting is to prepare the site and foundation for your ground solar mounting system. You need to do the following tasks:

• Clear the site of any debris, vegetation, or obstacles that may interfere with the installation

• Level the site and compact the soil to ensure a stable and even surface

• Mark the location and layout of the base rails and posts using stakes and strings

• Dig holes for the posts according to the manufacturer’s instructions, usually at least 1 meter deep

• Pour concrete into the holes and insert the posts, making sure they are plumb and aligned

• Attach the base rails to the posts using bolts or screws

Alternatively, you can hire a professional contractor to lay a concrete slab or use ground screws instead of concrete foundations for your ground solar mounting system.

Step 3:

Assemble the Frames and Panels for Your Ground Solar Mounting System
The third step to install solar panels on the ground using ground solar mounting is to assemble the frames and panels for your ground solar mounting system. You need to follow these steps:

• Unpack the components of your ground solar mounting system kit and check if they are complete and undamaged

• Lay out the frames on the ground according to the manufacturer’s instructions

• Connect the frames using bolts or screws, making sure they are square and secure

• Lift the frames onto the base rails and attach them using bolts or screws

• Lay out the panels on top of the frames according to the manufacturer’s instructions

• Attach the panels to the frames using clamps or bolts, making sure they are aligned and overlapping

Step 4:

Connect Your Ground Solar Mounting System to Your Home’s Electrical System
The fourth step to install solar panels on the ground using ground solar mounting is to connect your ground solar mounting system to your home’s electrical system. You need to do these tasks:

• Run conduit from your ground solar mounting system to your home’s main service panel

• Install an AC disconnect switch near your home’s main service panel

• Connect the conduit wires to your home’s main service panel through a dedicated circuit breaker

• Install an electric meter near your home’s main service panel

• Connect your ground solar mounting system to your utility grid through a net metering program

Alternatively, you can hire a licensed electrician to perform these tasks for you.

Conclusion

Installing solar panels on the ground using ground solar mounting is not a difficult task, but it does require some planning and preparation. By following these four easy steps, you can install solar panels on the ground using ground solar mounting in no time:

• Choose the right location and size for your ground solar mounting system

• Prepare the site and foundation for your ground solar mounting system

• Assemble the frames and panels for your ground solar mounting system

• Connect your ground solar mounting system to your home’s electrical system

A ground solar mounting system is a great way to generate clean and renewable energy for your home or business. A ground solar mounting system can also save you space, money, environment, enhance aesthetics, and provide convenience. To choose the best ground solar mounting system for your needs, you can use some online tools or consult with a professional solar installer.

Tile roof solar mounting systems
metal roof solar mounting systems
adjustable tile solar mounting systems
shingle roof solar mounting system
portrait ballasted solar mounting systems
Adjustable portrait flat roof solar mounting systems
Landscape ballasted solar mounting systems
adjustable landscape flat roof solar mounting systems
Double side ballasted solar mounting system
Aluminium ground mounting systems
steel solar ground mounting systems
pile driven solar ground mounting systems
carport solar mounting systems

 The cost of ground-mounted solar panels can vary depending on the type, size, and efficiency of the panels, as well as the location and labour cost to install them. However, a general estimate is that ground-mounted solar panels can be 25% to 35% more expensive than roof-mounted ones. For example, Solartherm UKhttps://solarthermuk.co.uk/ground-mounted-solar-panels/ states that the cost of ground mount systems is around 25/35% more than when on roof space. Similarly, Solar Choicehttps://www.solarchoice.net.au/learn/design-guide/ground-mounted-solar-systems/ estimates that for a straight-forward ground mount project, the costs are around 20c per watt greater than a rooftop system. Therefore, for a typical 4kW system, the price to install ground-mounted solar panels can range from £5,000 to £10,000.

Solar energy is the energy that comes from the sun and can be converted into electricity or heat. Solar energy has many benefits for humans and the environment, such as:

• Solar energy is a renewable and clean source of energy that does not produce greenhouse gases or air pollutants that contribute to climate change or health problems.

• Solar energy can reduce the dependence on fossil fuels and increase the energy security and diversity of countries that have abundant sunlight.

• Solar energy can lower the electricity bills of households and businesses that use solar panels or solar water heaters, and even generate income by selling excess electricity to the grid or storing it in batteries.

• Solar energy can create jobs and economic opportunities in the solar industry, which includes manufacturing, installation, maintenance, and research and development of solar technologies.

• Solar energy can provide electricity and heat to remote areas that lack access to the grid or other energy sources, improving the quality of life and education of people living in these areas.

Some examples of solar technologies that use solar energy are:

• Solar photovoltaic (PV) systems, which convert sunlight directly into electricity using solar cells. Solar PV systems can be installed on rooftops, ground, or other surfaces, and can be connected to the grid or operate independentlyhttps://www.linquip.com/blog/advantages-of-solar-energy/.

• Solar thermal systems, which use sunlight to heat water or air for domestic or industrial use. Solar thermal systems can be active, which use pumps or fans to circulate the fluid, or passive, which rely on natural convectionhttps://www.forbes.com/home-improvement/solar/solar-energy-pros-and-cons/.

• Concentrating solar power (CSP) systems, which use mirrors or lenses to concentrate sunlight onto a receiver that converts it into heat. The heat is then used to generate electricity using a steam turbine or a heat enginehttps://www.telefonica.com/en/communication-room/blog/what-is-solar-energy-types-advantages/.

• Solar fuels, which are synthetic fuels produced from sunlight, water, and carbon dioxide using chemical or biological processes. Solar fuels can be used as alternatives to fossil fuels for transportation or storage

How to Install Solar Panels on the Ground

How to Install Solar Panels on the Ground

Not everyone has a suitable roof for installing solar panels. If you have a large land area, low shading, or prefer not to drill holes in your roof, you may want to consider installing solar panels on the ground.

Ground-mounted solar panels are those that are installed on the ground, using either a fixed or a tracking mounting system. 

A fixed mounting system holds the solar panels at a fixed angle and orientation, usually facing south in the northern hemisphere and north in the southern hemisphere.

 A tracking mounting system adjusts the angle and orientation of the solar panels according to the movement of the sun, increasing the energy output by up to 25%.

we will show you how to install solar panels on the ground in four easy steps.

solar panel cleaning robot

Step 1: Choose the Right Location and Size for Your Ground-Mounted Solar System
The first step to install solar panels on the ground is to choose the right location and size for your ground-mounted solar system. You need to consider the following factors:

• The size and shape of your land and the amount of sunlight it receives

• The type and size of your solar panels and the amount of electricity they can produce

• The cost and efficiency of your solar panels and the payback period of your investment

• The local zoning and building codes and regulations that may affect the size, height, and placement of your ground-mounted solar system.

Step 2: Prepare the Site and Foundation for Your Ground-Mounted Solar System
The second step to install solar panels on the ground is to prepare the site and foundation for your ground-mounted solar system. You need to do the following tasks:

• Clear the site of any debris, vegetation, or obstacles that may interfere with the installation

• Level the site and compact the soil to ensure a stable and even surface

• Mark the location and layout of the base rails and posts using stakes and strings

• Dig holes for the posts according to the manufacturer’s instructions, usually at least 1 meter deep

• Pour concrete into the holes and insert the posts, making sure they are plumb and aligned

• Attach the base rails to the posts using bolts or screws

how to mount solar panel

can i put solar panels in my backyard

how to build a solar panel rack

Alternatively, you can hire a professional contractor to lay a concrete slab or use ground screws instead of concrete foundations for your ground-mounted solar system.

Step 3: Assemble the Frames and Panels for Your Ground-Mounted Solar System


The third step to install solar panels on the ground is to assemble the frames and panels for your ground-mounted solar system. You need to follow these steps:

• Unpack the components of your ground-mounted solar system kit and check if they are complete and undamaged

• Lay out the frames on the ground according to the manufacturer’s instructions

• Connect the frames using bolts or screws, making sure they are square and secure

• Lift the frames onto the base rails and attach them using bolts or screws

• Lay out the panels on top of the frames according to the manufacturer’s instructions

• Attach the panels to the frames using clamps or bolts, making sure they are aligned and overlapping

Step 4: Connect Your Ground-Mounted Solar System to Your Home’s Electrical System

The fourth step to install solar panels on the ground is to connect your ground-mounted solar system to your home’s electrical system. You need to do these tasks:

• Run conduit from your ground-mounted solar system to your home’s main service panel

• Install an AC disconnect switch near your home’s main service panel

• Connect the conduit wires to your home’s main service panel through a dedicated circuit breaker

• Install an electric meter near your home’s main service panel

• Connect your ground-mounted solar system to your utility grid through a net metering program

Alternatively, you can hire a licensed electrician to perform these tasks for you.

Conclusion


Installing solar panels on the ground is not a difficult task, but it does require some planning and preparation. By following these four easy steps, you can install solar panels on the ground in no time:

• Choose the right location and size for your ground-mounted solar system

• Prepare the site and foundation for your ground-mounted solar system

• Assemble the frames and panels for your ground-mounted solar system

• Connect your ground-mounted solar system to your home’s electrical system

A ground-mounted solar system is a great way to generate clean and renewable energy for your home or business. A ground-mounted solar system can also save you space, money, environment, enhance aesthetics, and provide convenience. To choose the best ground-mounted solar system for your needs, you can use some online tools or consult with a professional solar installer.

If you would like to know more,please buy a book from digital books.

How Much Are Solar Rack Ground Mounts? A Guide to Solar Racking Costs and Options
Solar energy is one of the most abundant and clean sources of renewable energy in the world. By installing solar panels on your property, you can harness the power of the sun and reduce your dependence on the grid, lower your electricity bills, and contribute to the fight against climate change.

However, installing solar panels is not just about choosing the right type and size of panels for your needs. You also need to consider the best way to mount them on your site, whether it is on your roof, on the ground, or on another structure. The mounting system, also known as the racking system, is the device that secures the solar panels to the surface and ensures their stability and safety.

The mounting system can have a significant impact on the performance, efficiency, and cost of your solar system. Therefore, choosing the right mounting system for your site is crucial. In this blog, we will focus on one of the most common and versatile mounting options: the solar rack ground mount.

What Is a Solar Rack Ground Mount?

A solar rack ground mount is a type of mounting system that installs solar panels on the ground, using metal frames, posts, and rails. A solar rack ground mount can be fixed or adjustable, depending on the design and preference of the installer. A fixed ground mount holds the solar panels at a fixed angle and orientation, usually facing south in the northern hemisphere and north in the southern hemisphere. An adjustable ground mount allows the solar panels to tilt or rotate according to the position of the sun, increasing the energy output by up to 25%.

A solar rack ground mount is suitable for sites that have a large land area, low shading, or unsuitable roofs for installing solar panels. A solar rack ground mount can also offer more flexibility and customization than a roof mount, as it can accommodate different types and sizes of solar panels, and different layouts and orientations.

How Much Does a Solar Rack Ground Mount Cost?

The cost of a solar rack ground mount can vary depending on several factors, such as the type, size, and efficiency of the solar panels, the design and complexity of the mounting system, the location and condition of the site, and the labor and installation fees. However, a general estimate is that a solar rack ground mount can be 25% to 35% more expensive than a roof mount, due to the additional materials and labor required.

According to the National Renewable Energy Laboratory (NREL), solar racking should cost approximately $0.16 per watt (W). Given that the average cost of a solar panel installation on the Marketplace is $2.95/W, racking should make up roughly 5% of the total system cost https://www.energysage.com/solar/solar-racking-overview/.

However, this estimate is based on rooftop racking, which is typically cheaper and easier to install than ground racking. According to Treehugger, rooftop racking can account for 10% of the total cost of an average rooftop solar system, or roughly $40 to $80 per panel, not including installation. By contrast, racking hardware for a ground-mounted frame system can cost $60 to $100 per panel https://www.treehugger.com/what-is-solar-racking-5210569.

Therefore, based on these estimates, a solar rack ground mount can cost anywhere from $0.24 to $0.40 per watt, or $60 to $100 per panel, not including installation. For a typical 6kW solar system, the price to install a solar rack ground mount can range from $1,440 to $2,400, not including installation.

Of course, these are just rough estimates, and the actual cost of a solar rack ground mount can vary depending on the specific details of each project. To get a more accurate quote, you should consult with a professional solar installer who can assess your site and provide you with the best options and prices.

What Are the Benefits and Challenges of a Solar Rack Ground Mount?

Installing a solar rack ground mount can have many benefits, such as:

• Increased energy production: A solar rack ground mount can maximize the amount of sunlight that the solar panels can capture, resulting in higher energy output and lower cost per watt. An adjustable ground mount can also track the sun and optimize the angle and orientation of the panels, increasing the energy output by up to 25%.

• Reduced roof damage: A solar rack ground mount can eliminate the need to drill holes or attach brackets to the roof, reducing the risk of leaks, cracks, or structural issues. A solar rack ground mount can also avoid the potential shading or cooling problems that may affect the performance and efficiency of the roof-mounted panels.

• Improved aesthetics: A solar rack ground mount can provide more flexibility and customization than a roof mount, as it can accommodate different types and sizes of solar panels, and different layouts and orientations. A solar rack ground mount can also blend in with the landscape or be hidden from view, depending on the preference of the owner.

However, installing a solar rack ground mount can also have some challenges, such as:

• Higher initial cost: A solar rack ground mount can increase the initial cost of the solar system, as it requires additional materials and labor for the installation. A solar rack ground mount may also require more permits and approvals from the authorities, which can add to the cost and time of the project.

• Higher maintenance: A solar rack ground mount can increase the maintenance of the solar system, as it is more exposed to the elements, such as dirt, dust, snow, or vandalism. A solar rack ground mount may also require more cleaning and inspection to ensure its optimal performance and safety.

• Higher environmental impact: A solar rack ground mount can increase the environmental impact of the solar system, as it consumes more land and resources, and may cause more erosion, runoff, or habitat loss. A solar rack ground mount may also cause more noise and visual pollution, depending on the location and design of the system.

Therefore, installing a solar rack ground mount requires a careful analysis of the costs and benefits, as well as the technical and environmental factors, of each project.

Conclusion

A solar rack ground mount is a type of mounting system that installs solar panels on the ground, using metal frames, posts, and rails. A solar rack ground mount can be fixed or adjustable, depending on the design and preference of the installer. A solar rack ground mount can cost anywhere from $0.24 to $0.40 per watt, or $60 to $100 per panel, not including installation. A solar rack ground mount can offer many benefits, such as increased energy production, reduced roof damage, and improved aesthetics. However, a solar rack ground mount can also have some challenges, such as higher initial cost, higher maintenance, and higher environmental impact. To choose the best solar rack ground mount for your project, you should consult with a professional solar installer who can provide you with the best options and prices.

Lorem ipsum dolor sit amet, consectetur adipiscing elit. Ut elit tellus, luctus nec ullamcorper mattis, pulvinar dapibus leo.

roof solar

A Guide to Choosing the Best Solar System for Your Roof

Roof solar is a term that refers to installing solar panels or shingles on your roof to generate electricity from the sun. 

Roof solar is one of the most popular and effective ways to go green and save money on your energy bills. 

However, not all roof solar systems are created equal. There are many factors to consider when choosing the best roof solar system for your needs, such as the type, size, efficiency, durability, cost, and aesthetics of the system.

We will explain the basics of roof solar, the different types of roof solar systems available, and how to choose the best one for your roof.

Metal proof system
novelty solar

The Basics of Roof Solar

Roof solar works by capturing the sunlight that falls on your roof and converting it into electricity. The electricity can then be used to power your home appliances, or stored in a battery or sent back to the grid for later use.

The basic components of a roof solar system are:

• Solar panels or shingles: These are the devices that absorb the photons from the sunlight and create an electric field across the layers of silicon cells. The electric field causes electrons to flow from one layer to another, creating a direct current (DC) electricity.

• Inverter: This is the device that converts the DC electricity into alternating current (AC) electricity that matches the voltage and frequency of your home’s electrical system.

• Mounting system: This is the device that secures the solar panels or shingles to your roof, ensuring stability and safety.

• Wiring and connectors: These are the devices that connect the solar panels or shingles to the inverter, and the inverter to your home’s electrical system or the grid.

•  Meter: This is the device that measures the amount of electricity you produce and consume, and determines how much you can sell back to the grid or store in a battery.

how many planets are there
The Different Types of Roof Solar Systems

There are two main types of roof solar systems: solar panels and solar shingles.

Solar Panels
Solar panels are the most common and widely used type of roof solar systems. Solar panels are rectangular modules that consist of multiple solar cells arranged in rows and columns. Solar panels are usually mounted on rails or brackets on top of your existing roof structure, leaving some gaps between the panels and the roof.

Solar panels come in different sizes, shapes, colors, and materials. The most common types of solar panels are:

• Monocrystalline: These are made of single-crystal silicon cells that have a uniform dark color and high efficiency. They are also more expensive and sensitive to high temperatures.

• Polycrystalline: These are made of multiple-crystal silicon cells that have a blue or black color and lower efficiency. They are also cheaper and more resistant to high temperatures.

• Thin-film: These are made of thin layers of different materials, such as amorphous silicon, cadmium telluride, or copper indium gallium selenide. They have a flexible and lightweight design and low efficiency. They are also cheaper and more adaptable to different surfaces.

Some examples of solar panel manufacturers are:

• SunPower https://www.tesla.com/solarroof, which offers high-efficiency monocrystalline panels with a 25-year warrantyhttps://www.tesla.com/solarroof.

• Canadian Solar https://www.leafscore.com/solar-guide/how-to-go-solar/best-solar-roof-options/, which offers low-cost polycrystalline panels with a 10-year warranty https://www.leafscore.com/solar-guide/how-to-go-solar/best-solar-roof-options/.

• First Solar https://www.gaf.com/en-us/solar-roof, which offers thin-film panels with a 25-year warrantyhttps://www.gaf.com/en-us/solar-roof.

Solar Shingles
Solar shingles are a newer and less common type of roof solar systems. Solar shingles are small modules that look like regular roof shingles or tiles. Solar shingles are integrated into your existing or new roof structure, replacing some of the roof shingles or tiles. Solar shingles have no gaps between them and the roof, creating a seamless and sleek appearance.

Solar shingles come in different sizes, shapes, colors, and materials. The most common types of solar shingles are:

• Silicon-based: These are made of silicon cells that have a similar design and efficiency as solar panels. They are also more durable and reliable.

• Non-silicon-based: These are made of different materials, such as copper indium gallium selenide or organic photovoltaic cells. They have a flexible and lightweight design and lower efficiency. They are also cheaper and more aesthetically pleasing.

Some examples of solar shingle manufacturers are:

• [Tesla], which offers glass solar tiles with a 25-year warranty.

• [CertainTeed], which offers silicon-based solar shingles with a 25-year warranty.

• [Luma], which offers non-silicon-based solar shingles with a 10-year warranty.

How to Choose the Best Roof Solar System for Your Roof
Choosing the best roof solar system for your roof depends on several factors, such as:

• The size and shape of your roof and the amount of sunlight it receives

• The type and size of your solar panels or shingles and the amount of electricity they can produce

• The cost and efficiency of your solar panels or shingles and the payback period of your investment

• The durability and warranty of your solar panels or shingles and the maintenance requirements

• The aesthetics and impact of your solar panels or shingles on your roof and your property value

To help you choose the best roof solar system for your roof, you can use some online tools, such as:

• [ValkPVplanner] by Van der Valk Solar Systems, which can calculate the correct mounting material for flat or pitched roofs.

• [SolarReviews’ solar panel mounts guide] by SolarReviews, which provides more information on different types of solar panel mounts.

Alternatively, you can consult with a professional solar installer, who can assess your roof and recommend the best roof solar system for your project.

Conclusion
Roof solar is a term that refers to installing solar panels or shingles on your roof to generate electricity from the sun. 

Roof solar is one of the most popular and effective ways to go green and save money on your energy bills. 

However, not all roof solar systems are created equal. 

There are two main types of roof solar systems: 

solar panels and solar shingles. Each type has its own advantages and disadvantages, depending on the specific needs and preferences of your project. 

To choose the best roof solar system for your roof, you can use some online tools or consult with a professional solar installer.


Solar Carport

Solar Carport: A Smart Way to Power Your Home and Vehicle Solar energy is one of the most abundant and clean sources of renewable energy in the world. 

However, many homeowners face challenges in installing solar panels on their roofs, such as limited space, high cost, structural issues, or aesthetic concerns.

 If you are looking for an alternative way to harness the power of the sun, you may want to consider a solar carport. A solar carport is a structure that consists of a roof with solar panels installed on it, supported by posts or columns. 


sun solar system

A solar carport can provide shade and protection for your car, as well as generate electricity for your home or electric vehicle.

 A solar carport can be attached to the side of your house or garage, or freestanding on your driveway or backyard. In this blog, we will explain what a solar carport is, how it works, what are its benefits, 

and how to choose the best one for your needs.

 What is a Solar Carport? 

A solar carport is a type of solar mounting system that installs solar panels on top of a carport structure. A carport is a simple and affordable way to shelter your car from the elements, such as rain, snow, hail, or UV rays.

 A carport usually consists of a roof supported by posts or columns, without walls or doors. 

A solar carport is similar to a regular carport, except that the roof holds or is made of solar panels. The solar panels are connected to an inverter, which converts the direct current (DC) electricity generated by the panels into alternating current (AC) electricity that can be used by your home appliances or electric vehicle. 

The inverter is also connected to your electric meter and the utility grid, which allows you to sell any excess electricity back to the utility company or store it in a battery for later use. 

A solar carport can be customized to fit different sizes and types of solar panels, as well as different orientations and inclinations.

 A solar carport can also be designed for single or double rows of parking, and can be integrated with an electric vehicle charging station. 


How Does a Solar Carport Work?

A solar carport works by capturing the sunlight that falls on the roof and converting it into electricity. The electricity can then be used to power your home or electric vehicle, or stored in a battery for backup power. The basic steps of how a solar carport works are as follows:

 • The solar panels on the roof absorb the photons from the sunlight and create an electric field across the layers of silicon cells.

 • The electric field causes electrons to flow from one layer to another, creating a direct current (DC) electricity. 

• The DC electricity travels through wires to an inverter, which converts it into alternating current (AC) electricity that matches the voltage and frequency of your home’s electrical system. 

• The AC electricity flows through wires to your electric meter and breaker panel, which distributes it to your home appliances or electric vehicle.

 • If you produce more electricity than you consume, the excess electricity can be sent back to the utility grid through a net metering program, which credits you for the power you export. Alternatively, you can store the excess electricity in a battery for later use.

 • If you consume more electricity than you produce, you can draw electricity from the utility grid or from your battery to supplement your needs. What are the Benefits of a Solar Carport? 

A solar carport offers many benefits for homeowners who want to go solar, such as:

 • Saving space: A solar carport utilizes the unused space of your carport, which can save you valuable roof or land space for other purposes. A solar carport can also fit in areas where rooftop solar may not be feasible or desirable, such as shaded roofs, flat roofs, or historic roofs. 

 • Saving money: A solar carport can reduce your electricity bills by generating your own clean energy. 

A solar carport can also increase the value of your property and qualify you for tax credits and incentives. According to Solar Reviews https://www.carportstructures.com/solar-carports/, a leading online platform for solar information https://www.carportstructures.com/solar-carports/, installing a 5 kW solar carport system can save you up to $25,000 over 25 years https://www.carportstructures.com/solar-carports/. 

• Saving environment: A solar carport can reduce your carbon footprint by avoiding fossil fuel consumption and greenhouse gas emissions. A solar carport can also reduce water evaporation and heat island effect by shading the ground surface.

 • Enhancing aesthetics: A solar carport can improve the appearance of your carport and your property by adding a modern and sleek touch. A solar carport can also blend in with the surrounding environment and architecture. 

• Providing convenience: A solar carport can provide convenience for your daily life by protecting your car from harsh weather conditions. A solar carport can also provide power for your electric vehicle or other appliances. 

How to Choose the Best Solar Carport for Your Needs? 

Choosing the best solar carport for your needs depends on several factors, 

such as: 

The size and type of your solar panels 

The size and shape of your carport

 • The location and orientation of your site 

• The local climate and weather conditions

 • The local regulations and permits 

• The budget and timeline of your project

 • The aesthetic and functional preferences of your project To help you choose the best solar carport for your needs, you can use some online tools,

 such as: https://www.cnet.com/home/energy-and-utilities/power-your-ev-or-home-with-clean-energy-from-a-solar-carport/, which can calculate the correct mounting material for flat or pitched roofs https://www.cnet.com/home/energy-and-utilities/power-your-ev-or-home-with-clean-energy-from-a-solar-carport/

• SolarReviews’ solar panel mounts guide https://www.carportstructures.com/solar-carports/ by SolarReviews https://www.carportstructures.com/solar-carports/, which provides more information on different types of solar panel mounts https://www.carportstructures.com/solar-carports/. Alternatively, you can consult with a professional solar installer, who can assess your site and recommend the best solar carport for your project.

how to install solar carport

HOW TO INSTALL SOLAR CARPORT

How to Install a Solar Carport in 5 Easy Steps

 A carport is a simple and affordable way to protect your car from the elements and add value to your property.

 A carport is a structure that consists of a roof supported by posts, usually attached to the side of a building or freestanding on the ground. 

A carport can be made of various materials, such as metal, wood, or vinyl, and can have different styles, such as flat, gable, or curved. Installing a carport is not a difficult task, but it does require some planning and preparation. In this blog, 

we will show you how to install a carport in 5 easy steps, using a metal carport kit as an example. 

Metal carports are durable, low-maintenance, and easy to assemble, making them a popular choice for many homeowners. 

Step 1: Choose the Right Location and Size for Your Carport The first step to install a carport is to choose the right location and size for your carport. You need to consider the following factors: • The size and shape of your car and other vehicles or equipment that you want to store under the carport • The available space on your property and the distance from the building or property line • The orientation and slope of the site and the exposure to sunlight and wind • The local zoning and building codes and regulations that may affect the size, height, and placement of your carport 

You can use online tools, 

such as ValkPVplanner https://bing.com/search?q=carport+installation&form=SKPBOT by Van der Valk Solar Systems 

or SolarReviews’ solar panel mounts guide https://www.oucuan.com/ by Solar Reviews https://www.oucuan.com/, to help you calculate the correct dimensions and materials for your carport. 

Step 2: 

Prepare the Site and Foundation for Your Carport The second step to install a carport is to prepare the site and foundation for your carport. You need to do the following tasks: 

• Clear the site of any debris, vegetation, or obstacles that may interfere with the installation 

• Level the site and compact the soil to ensure a stable and even surface 

• Mark the location and layout of the base rails and posts using stakes and strings

 • Dig holes for the posts according to the manufacturer’s instructions, usually at least 1 meter deep 

• Pour concrete into the holes and insert the posts, making sure they are plumb and aligned 

• Attach the base rails to the posts using bolts or screws Alternatively, you can hire a professional contractor to lay a concrete slab or use ground screws instead of concrete foundations for your carport. 

carport installation

Step 3: Assemble the Frames and Roof Panels for Your Carport The third step to install a carport is to assemble the frames and roof panels for your carport. You need to follow these steps: • Unpack the components of your carport kit and check if they are complete and undamaged • Lay out the frames on the ground according to the manufacturer’s instructions • Connect the frames using bolts or screws, making sure they are square and secure • Lift the frames onto the base rails and attach them using bolts or screws • Lay out the roof panels on top of the frames according to the manufacturer’s instructions • Attach the roof panels to the frames using bolts or screws, making sure they are aligned and overlapping

solar tracker

Step 4: Install the Trim and Accessories for Your Carport The fourth step to install a carport is to install the trim and accessories for your carport. You need to do these tasks: • Install the trim along the edges of the roof panels using bolts or screws, making sure they are flush and tight • Install any optional accessories, such as gable ends, side walls, doors, windows, lighting, or heating, according to the manufacturer’s instructions • Seal any gaps or holes with caulk or foam to prevent water leakage or air infiltration 

novelty solar

Step 5: Inspect and Maintain Your Carport The fifth step to install a carport is to inspect and maintain your carport. You need to do these tasks: • Inspect your carport for any defects or damages and fix them as soon as possible • Clean your carport regularly with mild soap and water to remove dirt, dust, or debris • Check your carport for any rust or corrosion and apply anti-rust paint or coating if needed • Tighten any loose bolts or screws and replace any missing or broken parts if needed Conclusion Installing a carport is not a difficult task, but it does require some planning and preparation. By following these 5 easy steps, you can install a carport in no time: • Choose the right location and size for your carport • Prepare the site and foundation for your carport • Assemble the frames and roof panels for your carport • Install the trim and accessories for your carport • Inspect and maintain your carport A carport is a simple and affordable way to protect your car from the elements and add value to your property.

Solar mounting
solar energy
sun solar system

A carport can be made of various materials, such as metal, wood, or vinyl, and can have different styles, such as flat, gable, or curved. A carport can also be used for other purposes, such as storage, workshop, or entertainment area. 

If you need more information or assistance with installing a carport, you can contact us at Carport

https://custom-canopies.co.uk/carports/, the leading provider of metal carports in the USA. We offer free delivery and installation, a 20-year warranty, and a variety of customization options for your carport. We can help you design and install your dream carport in no time.


aluminum carport solar mounting system

aluminum carport solar mounting system,Why You Should Consider Aluminum Carport Solar Mounting System for Your Home or Business 

Solar energy is one of the most abundant and clean sources of renewable energy in the world.

 However, many people face challenges in installing solar panels on their roofs, such as limited space, high cost, structural issues, or aesthetic concerns. 

If you are looking for an alternative way to harness the power of the sun, 

you may want to consider aluminum carport solar mounting system.

Aluminum Carport Solar Mounting System

Aluminum carport solar mounting system is a type of solar mounting system that installs solar panels on top of a carport structure, which is a shelter for vehicles that usually consists of a roof supported by posts. 

Aluminum carport solar mounting system can provide shade and protection for your cars, as well as generate electricity for your home or business. 

Aluminum carport solar mounting system is made of high-strength extruded aluminum alloy and galvanized steel, which are durable, corrosion-resistant, and lightweight.

Aluminum carport solar mounting system can be customized to fit different sizes and types of solar panels, as well as different orientations and inclinations. 

Aluminum carport solar mounting system can be designed for single or double rows of parking, and can be connected to the grid, battery storage, or electric vehicle charging stations. 

What are the Benefits of Aluminum Carport Solar Mounting System? 

Aluminum carport solar mounting system offers many benefits for homeowners and business owners who want to go solar.

Such as:

•Saving space: Aluminum carport solar mounting system utilizes the unused space of your carport, which can save you valuable roof or land space for other purposes. 

• Saving money: Aluminum carport solar mounting system can reduce your electricity bills by generating your own clean energy. Aluminum carport solar mounting system can also increase the value of your property and qualify you for tax credits and incentives.

• Saving environment: Aluminum carport solar mounting system can reduce your carbon footprint by avoiding fossil fuel consumption and greenhouse gas emissions. Aluminum carport solar mounting system can also reduce water evaporation and heat island effect by shading the ground surface.

 • Enhancing aesthetics: Aluminum carport solar mounting system can improve the appearance of your carport and your property by adding a modern and sleek touch. Aluminum carport solar mounting system can also blend in with the surrounding environment and architecture. 

• Providing convenience: Aluminum carport solar mounting system can provide convenience for your daily life by protecting your cars from harsh weather conditions, such as rain, snow, hail, or UV rays

. Aluminum carport solar mounting system can also provide power for your electric vehicles or other appliances. 

How to Choose the Best Aluminum Carport Solar Mounting System for Your Project?

How to Choose the Best Aluminum Carport Solar Mounting System for Your Project?

Choosing the best aluminum carport solar mounting system for your project depends on several factors,

 such as:

 • The size and type of your solar panels

 • The size and shape of your carport 

• The location and orientation of your site 

• The local climate and weather conditions 

• The local regulations and permits 

• The budget and timeline of your project 

• The aesthetic and functional preferences of your project To help you choose the best aluminum carport solar mounting system for your project, you can use some online tools, 

Such as: 

• ValkPVplanner

https://www.pv-magazine.com/2022/07/06/waterproof-all-aluminum-solar-carport-from-china/ by Van der Valk Solar Systems

https://www.pv-magazine.com/2022/07/06/waterproof-all-aluminum-solar-carport-from-china/, which can calculate the correct mounting material for flat or pitched roofs. 

• SolarReviews’ solar panel mounts guide

https://www.mbt-energy.com/knowledge/solar-carport-mounting-systems/ by SolarReviews

https://www.mbt-energy.com/knowledge/solar-carport-mounting-systems/, which provides more information on different types of solar panel mounts. 

Alternatively, you can consult with a professional solar installer, who can assess your site and recommend the best aluminum carport solar mounting system for your project. Conclusion Aluminum carport solar mounting system is a type of solar mounting system that installs solar panels on top of a carport structure. It can provide shade and protection for your cars, as well as generate electricity for your home or business. It can also save you space, money, environment, enhance aesthetics, and provide convenience. To choose the best aluminum carport solar mounting system for your project, you can use some online tools or consult with a professional solar installer.

how many planets are there

How to Choose the Best Solar Mounting System for Your Project 

How to Choose the Best Solar Mounting System for Your Project 

Solar mounting systems are essential components of any solar installation, as they secure the solar panels to the roof, ground, or other surface. Choosing the right solar mounting system can make a big difference in the performance, durability, and aesthetics of your solar project. 

But how do you know which solar mounting system is best for your specific needs? In this blog, we will introduce some of the main types of solar mounting systems and their advantages and disadvantages. Types of Solar Mounting Systems 

There are many types of solar mounting systems available in the market, but they can be broadly classified into three categories: roof mount, ground mount, and floating mount. Roof Mount Roof mount systems are the most common and popular type of solar mounting systems, as they utilize the existing roof space and do not require additional land or permits. Roof mount systems can be further divided into two subtypes: on-roof mount and in-roof mount. 

• On-roof mount systems attach the solar panels on top of the existing roof structure, using clamps, rails, brackets, or hooks. They are easy to install and compatible with most roof types, such as tiles, shingles, metal, or flat roofs. 

However, they may create gaps between the panels and the roof, which can affect the cooling and ventilation of the system. They may also increase the wind load and aesthetic impact on the roof. 

• In-roof mount systems integrate the solar panels into the roof structure, replacing some of the roof tiles or shingles. They offer a seamless and sleek appearance and reduce the wind load and fire risk.


However, they are more expensive and complex to install and may require modifications to the roof structure. 

They may also reduce the cooling and ventilation of the system. Some examples of roof mount systems are: 

• ValkPitched https://www.valksolarsystems.com/en by Van der Valk Solar Systems

https://www.valksolarsystems.com/en, which offers solutions for trapezoidal and corrugated metal roofs. 

• Mibet’s metal roof mount https://www.mibetsolar.com/ by Mibet Energy https://www.mibetsolar.com/, which offers solutions for trapezoidal and corrugated metal roofs.

 • Solar & Inverter Warehouse’s tile roof mount https://www.inverter-warehouse.co.za/collections/solar-mounting-systems by Solar & Inverter Warehouse https://www.inverter-warehouse.co.za/collections/solar-mounting-systems, which offers solutions for tile roofs. Ground Mount Ground mount systems are suitable for projects that have large land area and low shading. Ground mount systems can be further divided into two subtypes: fixed tilt and tracking. 

• Fixed tilt systems install the solar panels at a fixed angle and orientation, usually facing south in the northern hemisphere and north in the southern hemisphere. They are simple and cost-effective to install and maintain, but they may not capture the optimal amount of sunlight throughout the day and year. 

• Tracking systems adjust the angle and orientation of the solar panels according to the movement of the sun. They can increase the energy output by up to 25%, but they are more expensive and complex to install and maintain. They may also require more land area and clearance. 

Some examples of ground mount systems are: 

• GT2 https://www.segen.co.uk/products/mounting/ by Mibet Energy https://www.mibetsolar.com/, which features a sturdy pillar design and flexible installation directions. 

• GT7 https://www.segen.co.uk/products/mounting/ by Mibet Energy https://www.mibetsolar.com/, which features an aluminum structure and factory pre-assembled components.

 • Segen UK’s ground screw systemhttps://www.solarreviews.com/blog/solar-panel-mounts-guide by Segen UK https://www.segen.co.uk/products/mounting/, which uses ground screws instead of concrete foundations. Floating Mount Floating mount systems are an emerging type of solar mounting systems that install the solar panels on floating platforms on water bodies, such as lakes, reservoirs, or ponds. Floating mount systems can reduce water evaporation, algae growth, and land use. They can also increase the energy output by up to 10%, as water provides natural cooling and reflection for the panels. However, they are more challenging to install and maintain, as they require special materials and equipment that can withstand water corrosion and wave motion. They may also pose environmental and social impacts on aquatic life and local communities. 

Some examples of floating mount systems are: 

• [MRac floating system] by Mibet Energy https://www.mibetsolar.com/, which is industry-leading in design. 

• [Van der Valk Solar Systems’ floating system] by Van der Valk Solar Systems https://www.valksolarsystems.com/en, which is innovative and customer-oriented. 

• [SolarReviews’ floating system guide] by SolarReviews https://www.solarreviews.com/blog/solar-panel-mounts-guide, which provides more information on floating mount systems. How to Choose the Best Solar Mounting System for Your Project

The type and size of your solar panels

 • The location and orientation of your site 

• The available roof or land space 

• The local climate and weather conditions

 • The local regulations and permits 

• The budget and timeline of your project 

• The aesthetic and environmental preferences of your project To help you choose the best solar mounting system for your project, you can use some online tools, such as:

 • [ValkPVplanner] by Van der Valk Solar Systems https://www.valksolarsystems.com/en, which can calculate the correct mounting material for flat or pitched roofs. 

• [ValkKITSplanner] by Van der Valk Solar Systems https://www.valksolarsystems.com/en, which can calculate the correct mounting material for prepackaged PV mounting systems. 

• SolarReviews’ solar panel mounts guide https://www.solarreviews.com/blog/solar-panel-mounts-guide by SolarReviews https://www.solarreviews.com/blog/solar-panel-mounts-guide, which provides more information on different types of solar panel mounts. Alternatively, you can consult with a professional solar installer, who can assess your site and recommend the best solar mounting system for your project. Conclusion Solar mounting systems are essential components of any solar installation, as they secure the solar panels to the roof, ground, or other surface. Choosing the right solar mounting system can make a big difference in the performance, durability, and aesthetics of your solar project. There are many types of solar mounting systems available in the market, such as roof mount, ground mount, and floating mount. Each type has its own advantages and disadvantages, depending on the specific needs and preferences of your project. To choose the best solar mounting system for your project, you can use some online tools or consult with a professional solar installer.